ITS does not support the UVA Anywhere VPN client on Linux. These instructions may work but they are provided for user information only. UVA RC does not support usage of the VPN on any platform.
Setting up the VPN
-
Install Software Prerequisites
You must install some software using yum,dnf, or apt-get. Note the slight difference in naming convention between distributions.
It will be necessary for Network Manager to be able to manage the connection.
-
Obtain a Certificate
Go to this unpublicized Web location to obtain a certificate for n non-specific OS. You will be required to sign in with Netbadge. Once authenticated, fill out the form.
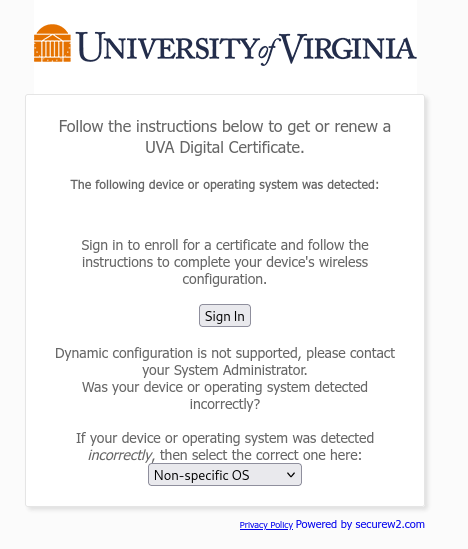
Your passphrase need not be related to your Netbadge password, and it must be 15 characters or fewer. The MAC address of your system is optional for UVA Anywhere.
Click the link to download the certificate. You will receive a file ending in .p12. In this example we will assume it is named mst3k.p12.
Do not click the Next button. Once the download is completed, you may close the tab for the certificate site.

-
Configure with Network Manager
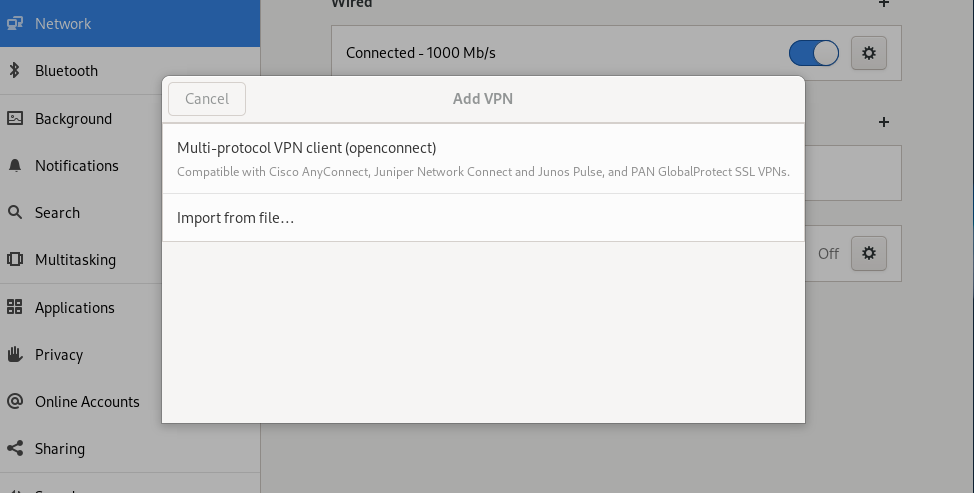
Click the network app in your tray, or go to Settings->Network. Choose VPN and click the + to add a VPN.
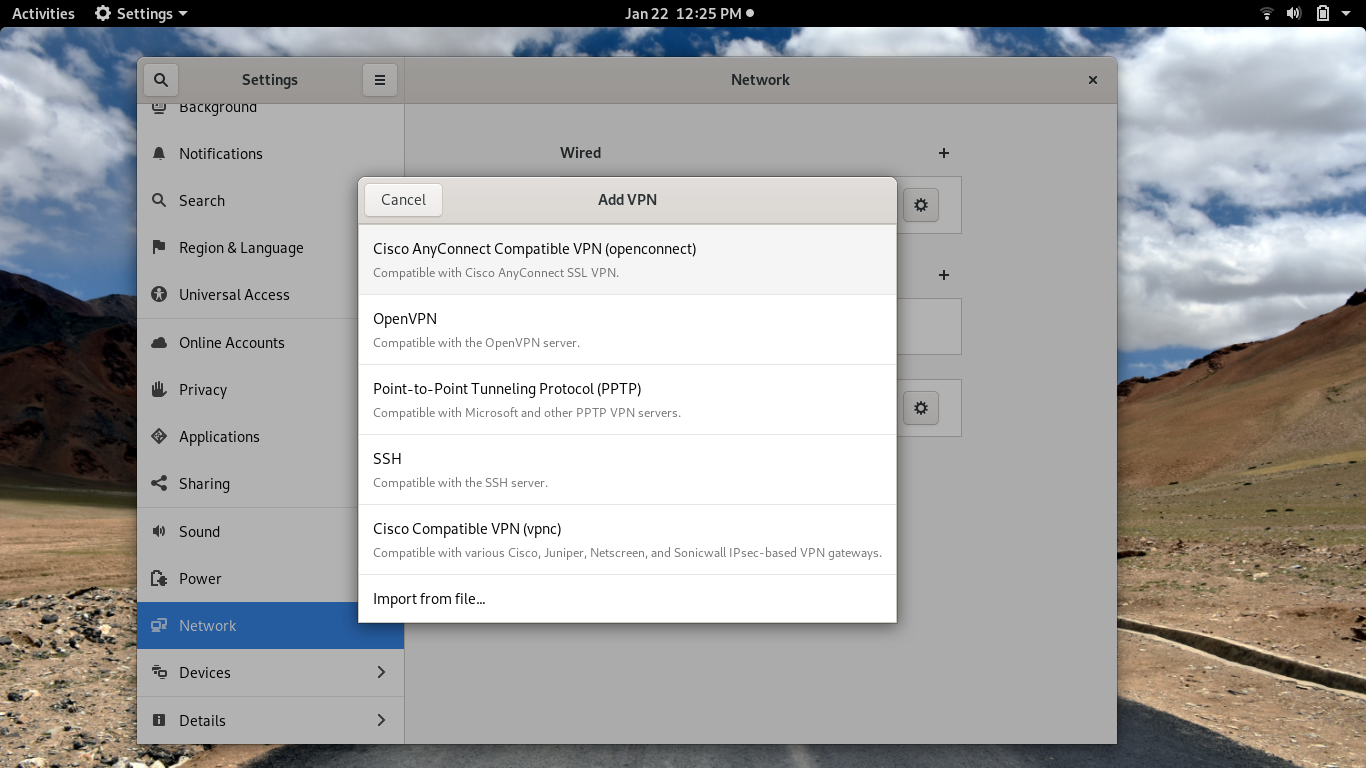
Select the Cisco Anyconnect compatible VPN option.
Fill in the blanks for a new VPN. Please use the More Secure VPN if you have access to it. The gateway is moresecure-vpn-1.itc.virginia.edu. Otherwise, use the UVA Anywhere VPN whose gateway is uva-anywhere-1.itc.virginia.edu as shown in the figure below.
NetWork Manager may not recognize the .p12 format. You can use the file manager of your desktop system to drag and drop the file into both the “User Certificate” and the “Private Key” boxes.
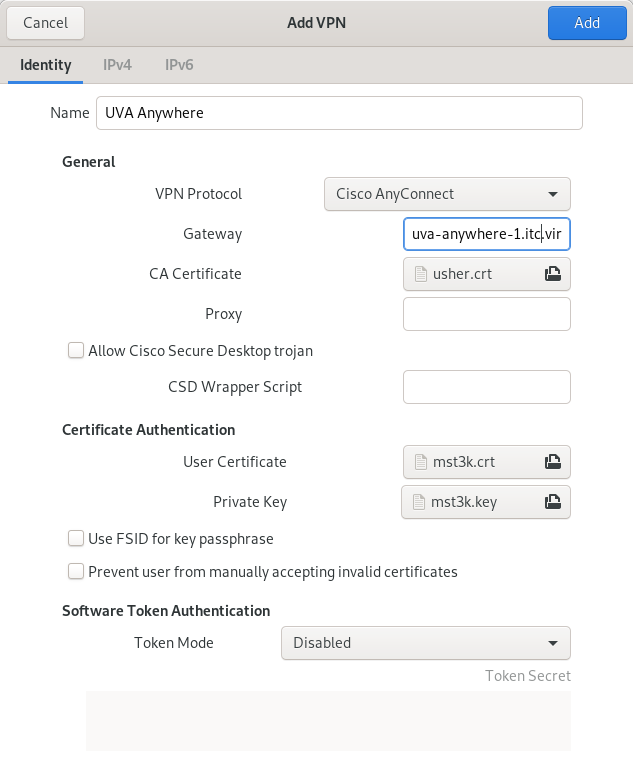
Click “Add.”
In the Details tab, make sure that “Make available to all users” is not checked. This should be the default.
Connecting to the VPN
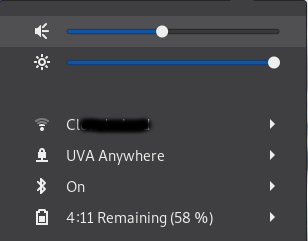
Start the VPN through the Network Manager, either through the applet in the tray (Ubuntu) or in the Notifications section of the taskbar (Rocky/Alma/Fedora). The state can be controlled through the right arrow.
For the first connection, you may need to go through the Settings application to connect. After that, log out. When you log back in, your VPN should appear in the taskbar or tray (the illustration was taken from a Rocky Linux installation).
More Secure VPN
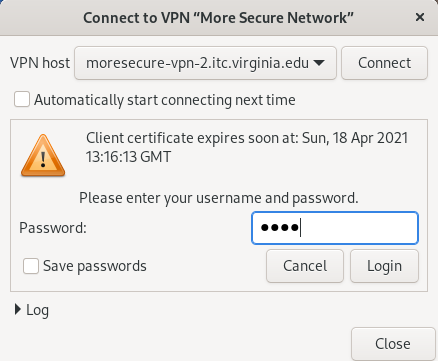
UPDATE: Users of the More Secure VPN will now be required to authenticate through Duo before connecting. When prompted for a password, enter the word push or PUSH (it is not case-sensitive); you will then receive an approval notification on your mobile device. After approving the request, the client will connect to the VPN. Alternatively, you may enter a passcode generated by Duo as the password.
|
userinfo
login, security, vpn